How to Paint Kitchen Cabinets Like a Professional
I can’t wait to share with you my Kitchen Makeover and how you can paint kitchen cabinets like a professional!
If you’ve been around MHR for any bit of time you’ll know that I’ve HATED my kitchen. I’ve been trying to dig up pictures of the before and show the SLOW transition over the past three years, but, I’m coming up empty. Now as you may know, we purchased our home from Jason’s Mom. This home has been in the Loehner family and built new by Jason’s Grandfather in the early 60’s. There’s lots of memories in this house and one we wanted to keep alive. I will say that this is FAR from my dream home, but, we are slowly working to make it into something that we love.
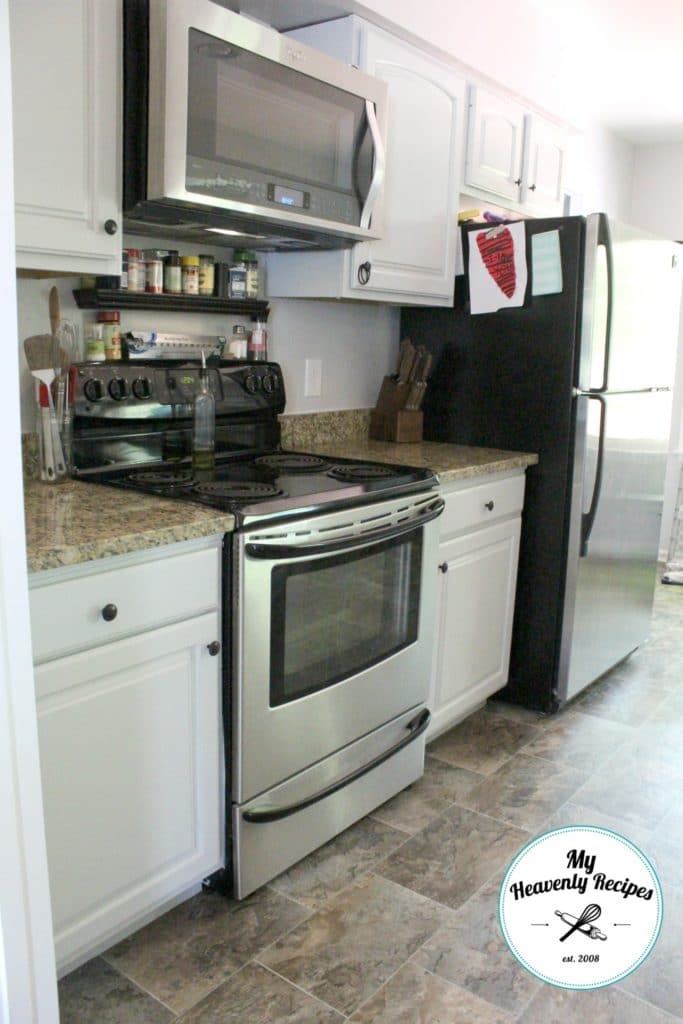

If you know me personally you know that I LOVE to entertain. With my passion for cooking, eating and drinking I love having our family and friends gathered around creating our own memories and stories that I’ll tell my Grandchildren and our kids will tell their Grandchildren.
I’ve spent quite a bit of time on Pinterest pinning to the For The Home Board. At first I wanted a darker gray color to play off the countertops and floor. Then I wanted a light gray with black glaze and now I just wanna keep them how they turned out!
First, Sherwin-Williams is no longer carrying Black Glaze. In fact, the store associate told me that they are diminishing their faux line of products. At first I was pretty bummed, but, let’s be honest I think this whole “glaze technique” is a fad. Not to mention who the hell wants to sand the nooks and crannies of a cabinet when they need to repaint their cabinet because the fad is gone?!? NOT ME!
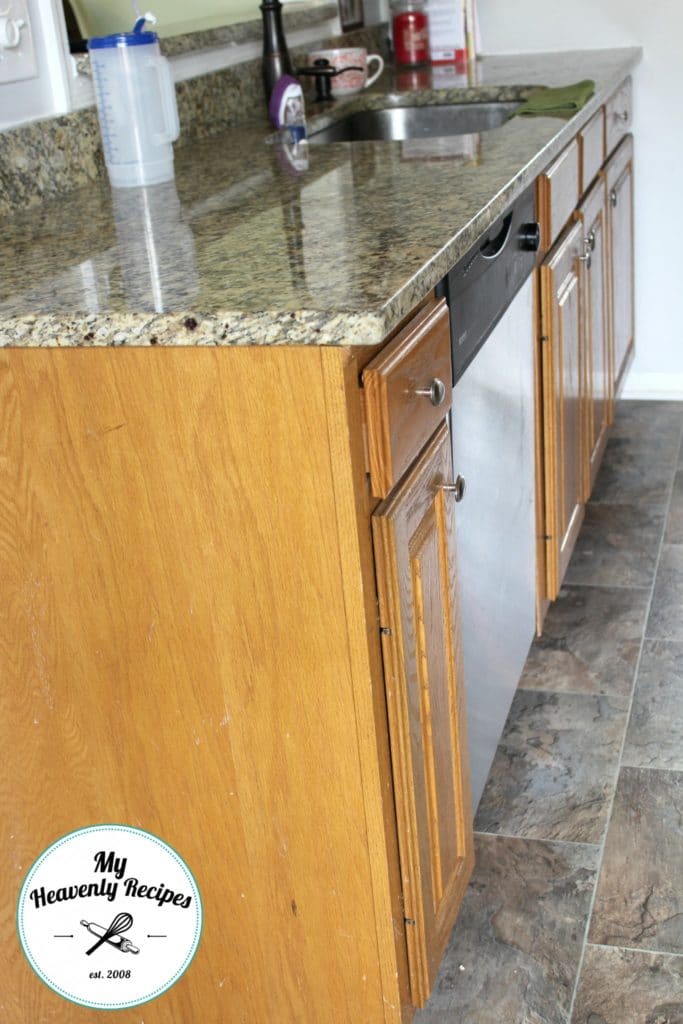
The first time I headed to Sherwin-Williams was to grab a few paint colors that I thought I wanted. Once I brought them into the kitchen ALL of the colors failed me. I was pretty devestated and then started second guessing myself. I feel like I’m so good at helping friends put their houses together, but, when it comes to my own I want it to be perfect since a few friends turn to me for decorating needs.
I don’t have the most glamorous house, but, it works for us {right now!}. I think the most important thing for me is to make this house our home. I often am reminded of what the house once was and I don’t want it to be the mess that it use to be. As friends and family come over and visit they have remarks like “you’ve done a lot to the house”, “I can’t believe all the work you’ve done”, etc. and while I appreciate the comments IT HAS BEEN A TON OF WORK!
We knew this coming into buying the house, but, quite frankly, we overpaid for it I think because we wanted my Mother in Law to have a secure future, be able to travel, enjoy her retirement and in the end be in a comfortable, secure and local nursing home that would accomodate her as her dementia progresses….that’s a whole other story!
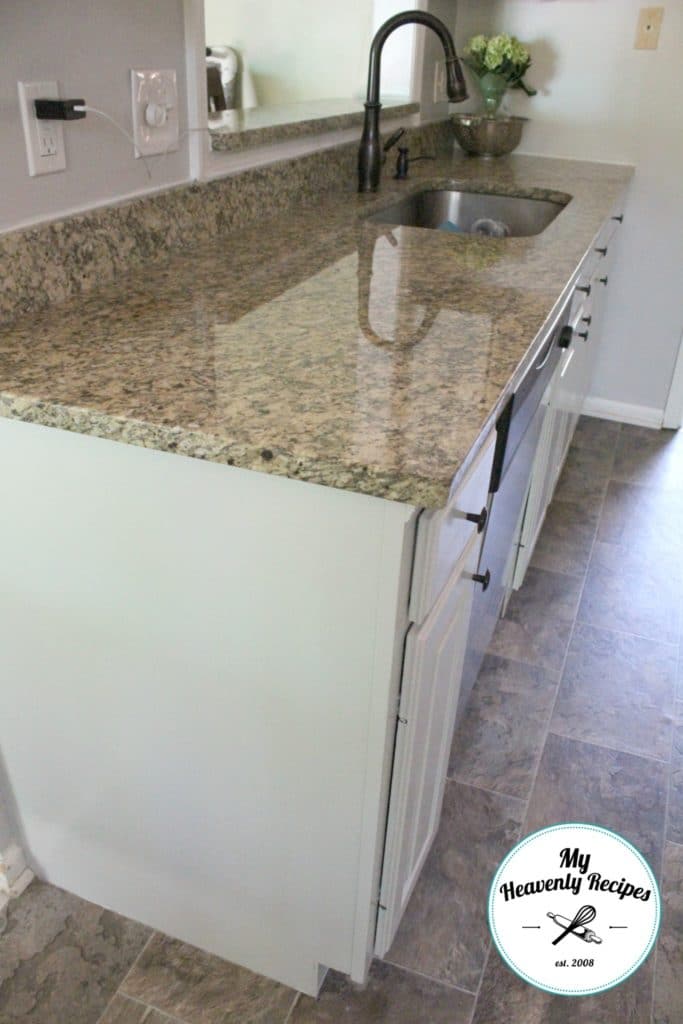
My faucet is a Moen Brantford MotionSense in Oil Rubbed Bronze, you can find it here.
So for the time being {and because money doesn’t grow on trees} I’ve been tackling as many DIY projects as I possibly can. Not only is it saving us money, but, it gives me the satisfaction that I did it all by myself and am fully capable of making our home beautiful. For the past three years these DIY Projects have been put on hold because I was either
1. pregnant with Hyperemesis
2. Had a newborn and girls to care for
3. Got injured with my foot injury and recovered from surgery for the past 10 months.
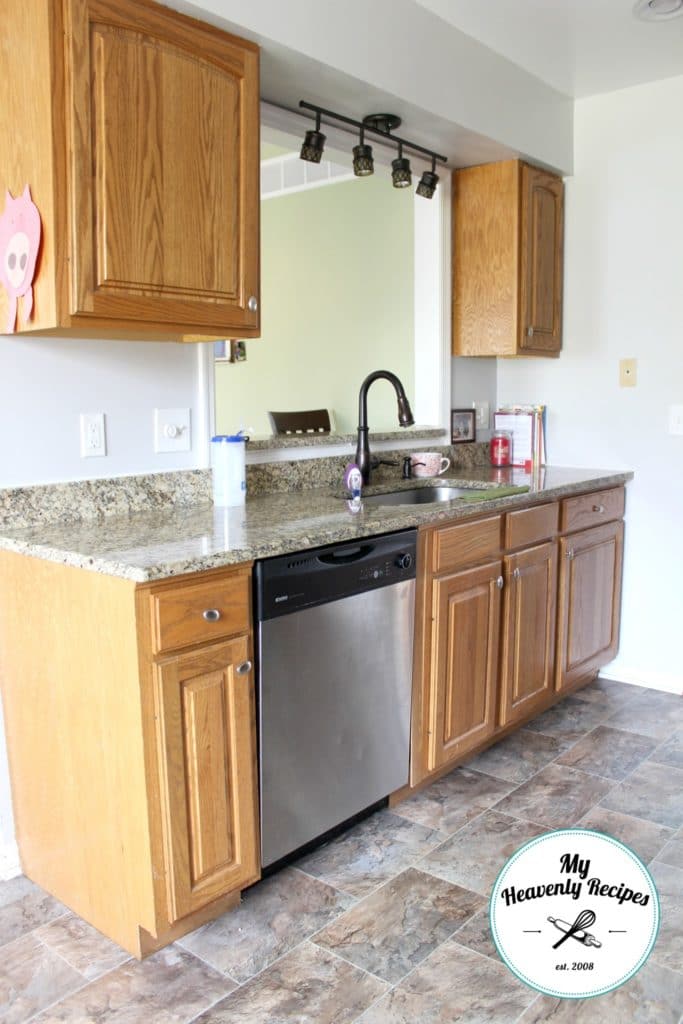
I spent a few hours over the course of two weeks researching what the professionals do and use when they paint kitchen cabinets like a professional. I searched all over the internet, came across a couple of blogs and lastly headed on over to YouTube.
Here’s what I my conclusion was:
- They use oil based products (primer and paint).
- They sand, sand and sand some more.
- It takes at least a week to complete, more often three to four weeks as they are typically working on multiple kitchens at one time, allowing for dry time, working on doors at their shop, etc.
- Spraying the cabinets and frames is how the professionals do it.
- They tape off EVERYTHING and throw up plastic inside the cabinets.
As a tired Momma of 3 little kids, living in the house and trying to still cook in the kitchen while this was all going down, here’s what actually happened:
- When using oil based products, make sure your rooms are WELL ventilated.
- Sand, sand and sand some more feeling with bare hand that you end up with a smooth result.
- Find your patience, it takes about a week to complete with the size of my kitchen (and that was me hussling by myself).
- If you are moving into a new house complete this project BEFORE moving in.
- DON’T tape anything off…Stay with me! You’re left with a mess, will hand wash everything and end up with a ton of items to donate! You can Thank me later!
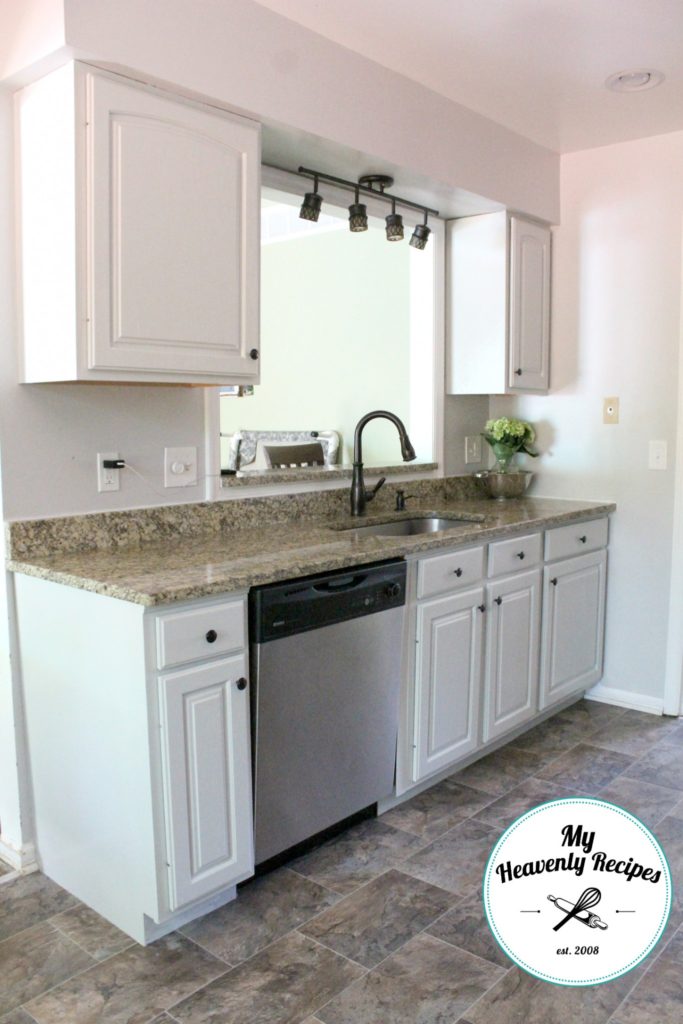
Now here’s how it went down:
- Jas helped me remove ALL the cabinet doors. I kept the drawers in place.
- Tape off EVERYWHERE you don’t want the new paint, floors and countertops included.
- I took the cabinet doors to the garage and cleaned them with Krud Kutter. This removed a lot of the film and was a lot easier to sand.
- I sanded all the cabinet doors with 120 grit sand paper and a sanding block. This took quite a bit of time (about a full day), but, it was worth it. The prep work is what is going to make or break your cabinets. Much to my surprise there wasn’t much left on these 15 year old cabinets. If you have painted cabinets already, I would recommend stripping them entirely to make your process have a professional look.
- Once the cabinets were all sanded I came through with a tack cloth and wiped all the residual dust and also used Jason’s air compressor to get the dust out of the groove of the cabinets.
- I came up stairs and repeated the process with cleaning, sanding and wiping the frames of the cabinets and the drawers.
- Now it was time for primer! I bought a quart of Sherwin-Williams All Purpose Oil Based Primer. It was a bit costly at $25, but, I think it was worth it. I used a 6″ High Density Foam Roller that I picked up from Home Depot and did the front side on the first day. Once they were dried I flipped them over and on the second day painted the back of the cabinet.
- I then came up stairs and primed all of the frames of the cabinets.
- And again…I got to sanding. Now this doesn’t sound like a work, but, dear Baby Jesus, it is A LOT of work! Especially if you are doing it solo. This time I ended up using a 220 grit sand paper. I wasn’t necessarily sanding for the smoothness because that part was already completed on round 1 of sanding. Instead, I was knocking off any of the dirt that happened to find it’s way into the primer and rough it up for the paint to stick.
- Once the sanding was complete I got a new tack cloth and got the air compressor out once more. I made sure to get all the crevices cleaned out and went back a second time with a tack cloth just incase.
- It was time for paint my friends!!! I was a bit nervous, but, was excited to start this process. In the garage I filled in all the small areas with a 1″ angle brush. I wanted to use the paint to fill in the cracks of the cabinet to make it look like it was one piece. I then rolled all that areas that I could with a new foam roller and if I needed to come back and touch up a spot I made sure to grab a little bit of paint with the hand brush and lightly touched up the areas. Now I also used to roller to do the sides of the cabinets. If you are going to do this, be sure to pay attention and make sure there are no drip marks.
- I laid each cabinet flat so that the paint could dry evenly. This is imperative!!! Now I will say that the “professionals” will screw in a eye hook and hang from a set up using more or less two ladders with a few pieces of 2×4’s. This is great if you have the space and are using a spray gun, but, I didn’t have all that space. I had barely enough for what I needed.
Now I know ya’ll wanna know what products I used – so here they are:
- Sherwin-Williams Pro Classic Oil Based Paint (Aloof Gray)
- Sherwin-Williams All Purpose Oil Primer
- Scotch Blue Tape
- Sanding Block
- 220 Sand Paper
- 150 Sand Paper
- Krud Kutter
- Tack Cloths
- 6″ High Density Foam Rollers (threw away at the end of each day)
- 1″ Angle Brush (for cutting in)
A few of my other DIY PROJECTS you might be interested in:
The total cost for me to do this kitchen ALL BY MYSELF was just under $150! But, the pride I have in myself that I did it, the cabinets look AMAZING and the compliments I’ve been receiving has been all I needed. The $1,500 in savings from not hiring a professional is an added bonus!
My friends at Sherwin-Williams did provide me with the paint. However, I paid for EVERYTHING else including the All Purpose primer. This is a DIY Project I have wanted to complete for three years. I am BEYOND thrilled with the results and still can’t believe that I did it all by myself! Since the completion I’ve had two friends ask me to do their kitchens….we shall see where this ends up!
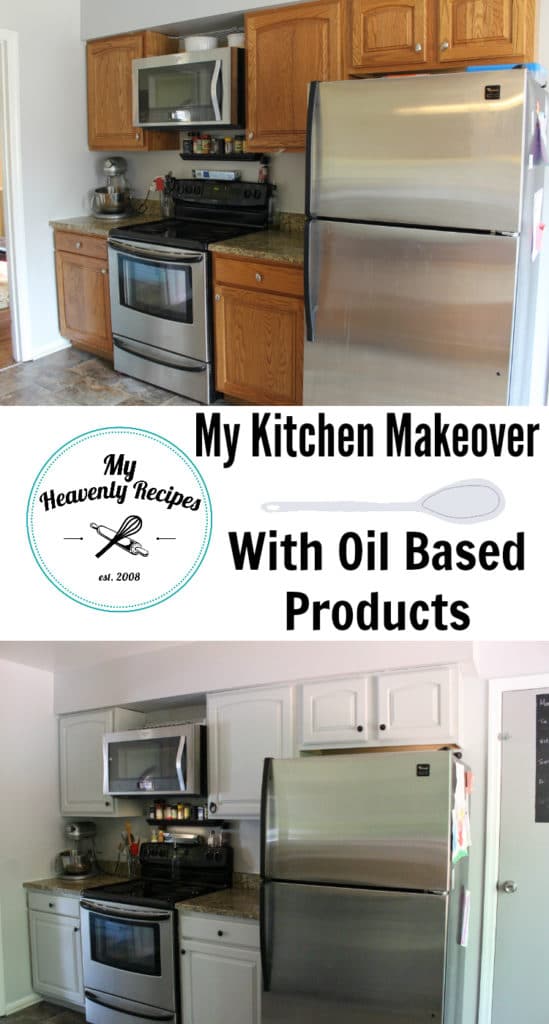

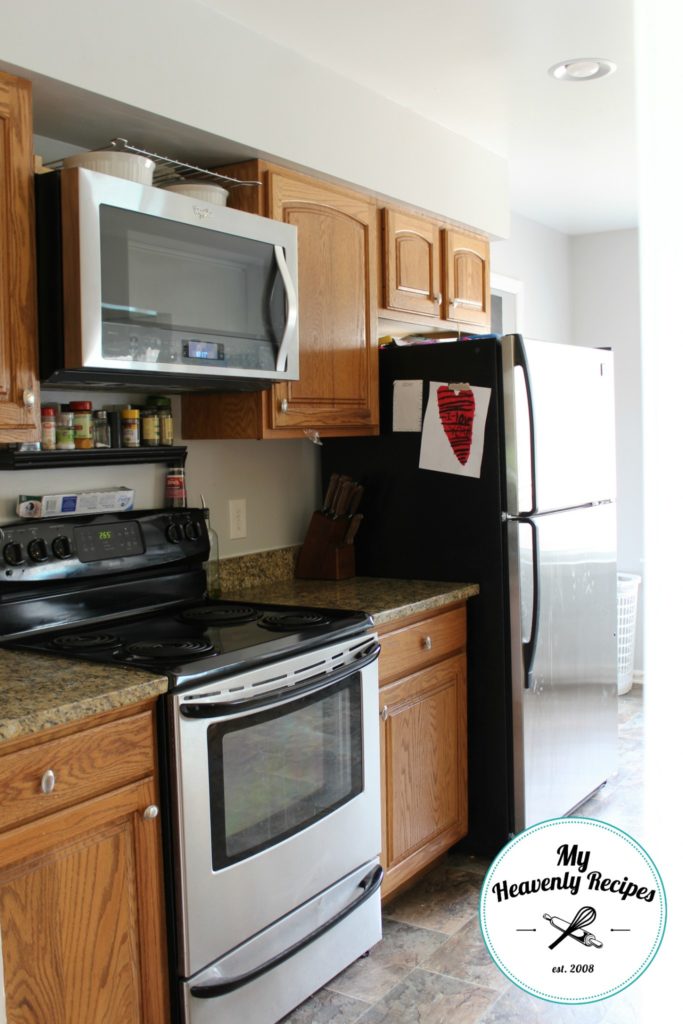



What a great transformation! I think you will be happy you went with Oil Based paint, it will hold up so much longer and better than some of the other products out there. It looks great and it really makes that beautiful counter top shine 😀
Awww Thank You so much Toni! I did a TON of research and knew I didn’t want to use latex or a chalk paint, especially with kids and dogs…that are CONSTANTLY finding their way into the kitchen!!!
Looks awesome! Can I have my apartment complex hire you?! 😛
Bwahahaha! I don’t know if I have all the patience for that 😉
How did you get the end cabinets on outside corner to take the paint cause mine have some type of skin coating that if you sand seems to peel, scratch, or warp especially on the sides of cabinets.
Looks fantastic. What shade of white did you use?? I am so nervous about painting my cabinets white, although am desperate for my kitchen to look like this.
What is the color of the paint by SW and do you cabinets have a shine to them?
Hi Ellen – the color from Sherwin Williams is Aloof Gray! They have sort of a gloss to them and it helps reflect the light. But, it’s not a high gloss.
Hi Rebecca! It’s actually Aloof Gray from Sherwin-Williams! I’d say go for it. Take your time. Prep the cabinets and frames. Be sure to come back and let me know how they turn out!
Hi Donna. It sounds like you may need to prep the outsides of the cabinets really well with Krud Kutter or a similar product. Feel free to shoot me a image of your cabinets to Marci@MyHeavenlyRecipes.com and I’ll see what I can’t do!
Hi Marci and DeeDeeK,
I know what DeeDeeK is referring to. My cabinets are all wood doors, but all framing of the doors and sides of the cabinets are like a particle board with a contact paper over them. I have yet to figure out how to paint those pieces to match the cabinet doors when I paint them. Any suggestions? Your kitchen looks beautiful!