Chalk Painted Front Door (DIY Tutorial)
A chalk painted front door makes an inviting entrance to a home. In this DIY tutorial post, you’ll learn how easy it is to paint a door with chalk paint!
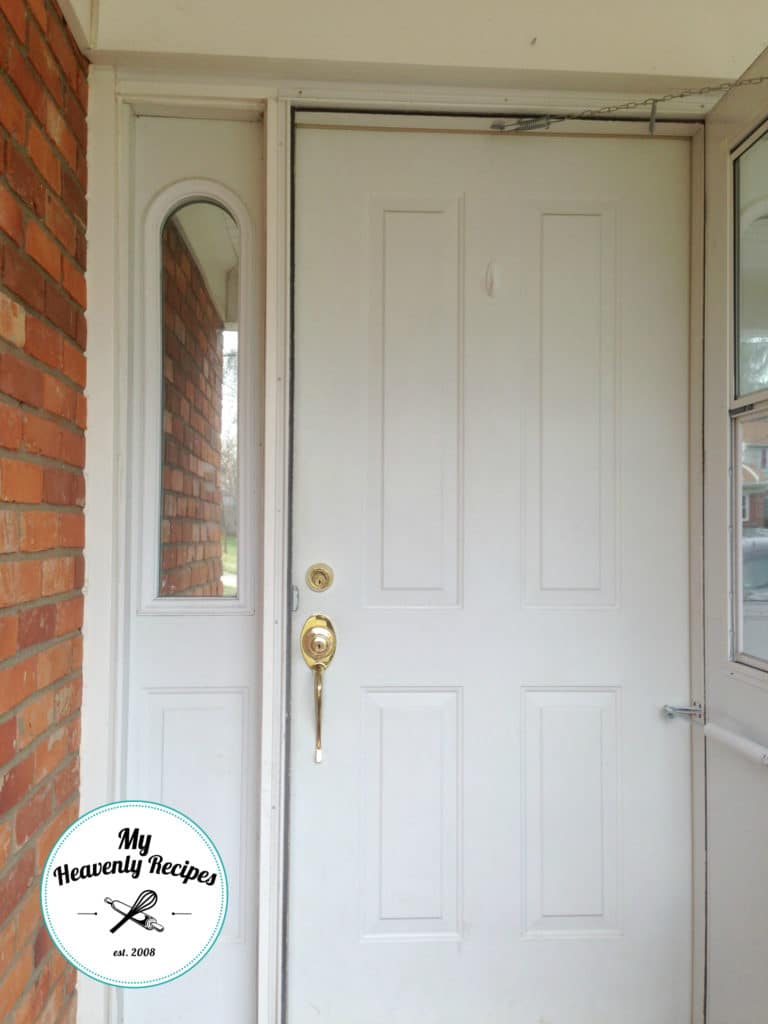
I invite you to our home…okay maybe the outside of our home! This is a little tutorial on how I painted the front door with chalk paint!
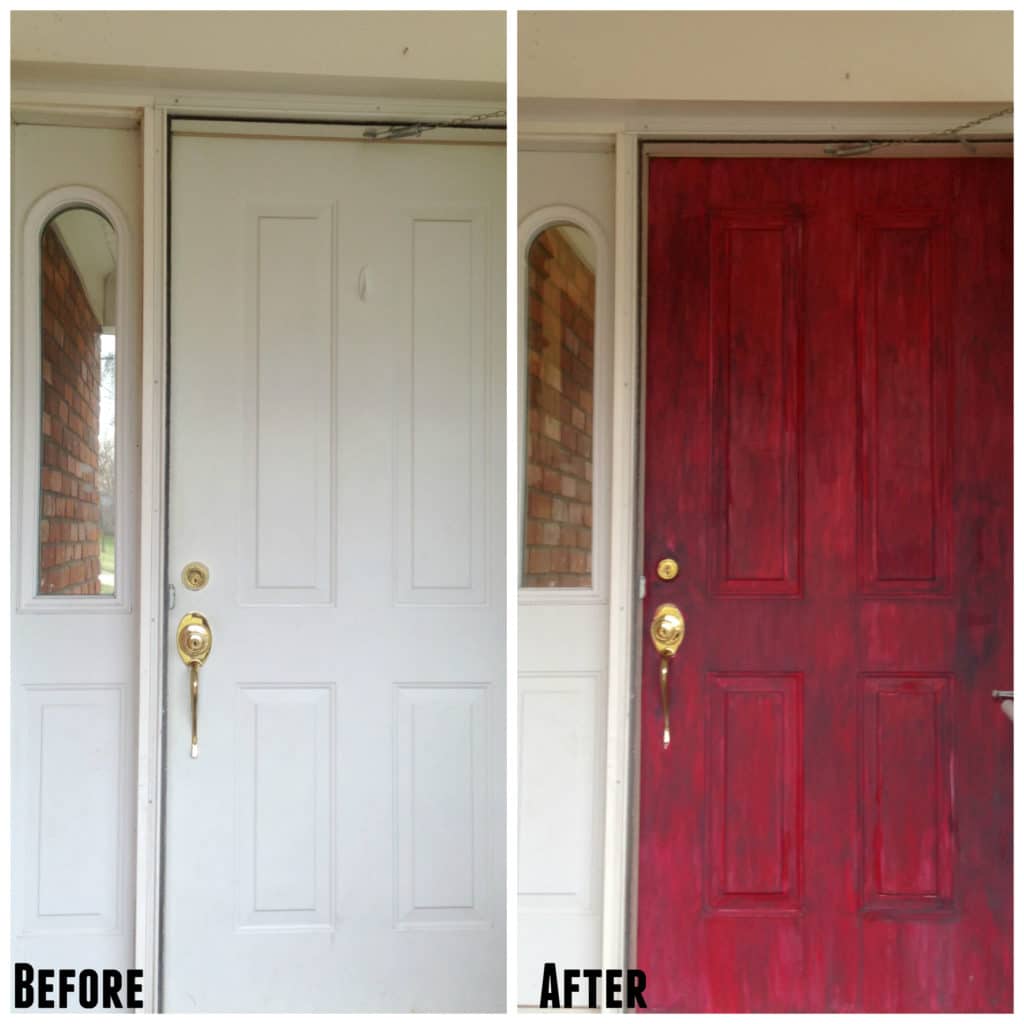
Welcome to our old boring front door! Look kids and dogs don’t get along with a white front door. Sure it would be awesome if the ENTIRE family agreed on cleanliness, but, with our backyards being woods and being outside when we can, it’s tough to keep it clean.
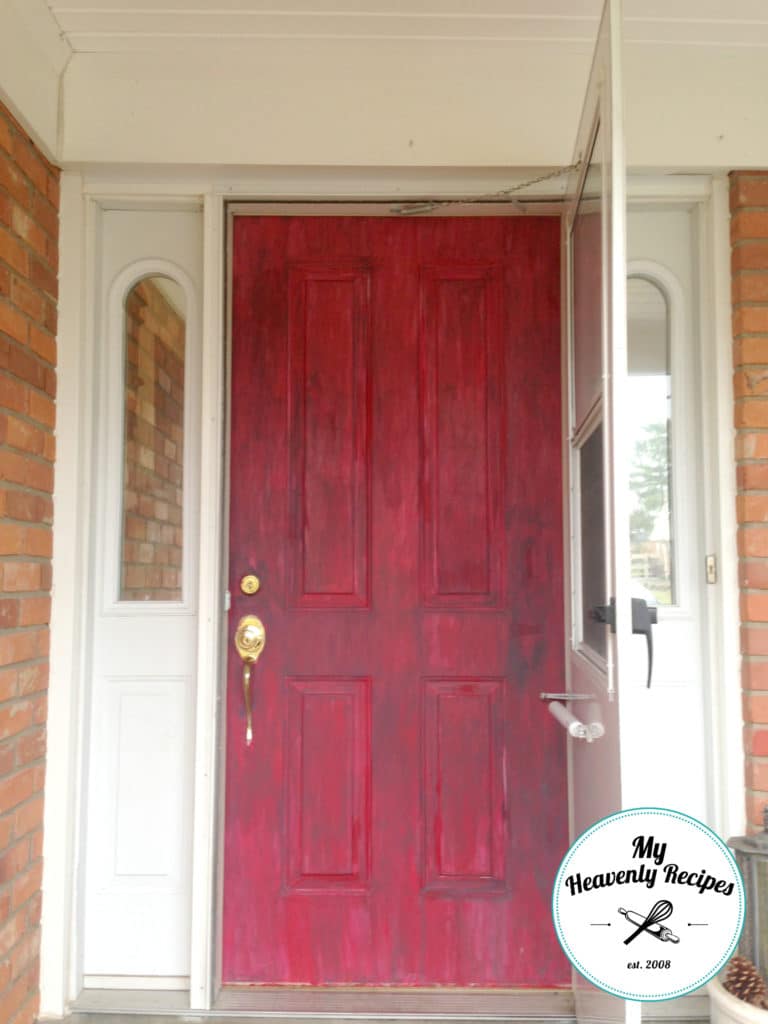
A few months after my reconstructed foot surgery, I was getting the bug to do something…anything. I started with my Fireplace Makeover {that also involved chalk paint!}. I then ended up with a painted front door using chalk paint and continued on until my Kitchen Makeover was complete!
Now, our front porch is covered from the weather, so PLEASE keep that in mind should you decide to take some direction from my chalk painted front door tutorial…ok?!? Anyhow.
I was bored and decided to give my hand a try at that “dry brushing” technique. I still honestly don’t know what it’s called, but, I think it looks aged, antiqued and at the same time a modern spin on things. Plus, it took about an hour to complete the chalk painted front door project.
How to create a chalk painted front door
Supplies needed for the chalk painted front door DIY project:
I used three products for this chalk painted front door makeover:
- Americana Decor Chalky Finish in Romance
- Americana Decor Chalky Paint in Relic
- Americana Decor Cream Wax, Clear
Using a dry 3″ Paint Brush I applied the Romance Chalky Finish over the entire door. Once I dipped the paint brush in the chalky finish I made sure to use up all the paint on the brush and blended it in as I went to get a brushed look. Once the door was completed in Romance, I came through with the Relic paint and again used the dry brush to apply to the door. This is what gave the door some dimension. Now there is no right or wrong way to this. It’s all in what you are looking for and what you like!
The final step was to apply the Cream Wax with a wax brush. Doing this made it more of a polished look. It also “smoothed” out the door and protects it from any chipping, scratches and cracking…because well. KIDS. DOGS. Can I get an AMEN?
Now, I want to point out two things.
1. I NEED to replace the front door deadbolt and handle. It’s U.G.L.Y. So, if you have any recommendations on what to replace it with please leave a comment below.
2. While I LOVE a red front door, the entire front of the house will be getting a makeover {with my DREAM front porch!}. I’d ideally like to just replace the screen door and front door all together…so again, give me your thoughts!


