Our Year Long DIY Basement Remodel
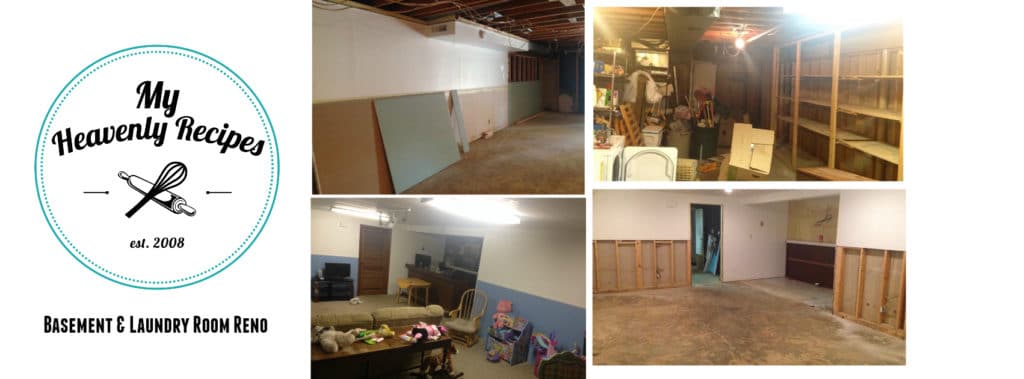
You guys. I simply don’t even know where to start with out DIY Basement Remodel. It’s been quite the year and I’m SO glad that it’s nearly completed!
Disclosure: I partnered with Floor & Decor on the flooring in our basement. They provided me with a $500 Gift Certificate, we ended up spending that & more!
What can I say about our DIY Basement Remodel other than it was a complete disaster before and during! But, I’m simply IN LOVE with it now that it’s completed and we are now able to enjoy it!
I’ll start by saying that we were CONSTANTLY sick. Like sick with pneumonia, bronchitis, stomach bugs, headaches, you name it, we’ve had it since we moved into this house. Now, to give you a little back story, we bought our home from my Mother In Law. The home was built new in the 60’s by my Husband’s Grandfather. We were given the opportunity to purchase the home from my Mother In Law and we took it….
Now, we overpaid for it. I’ll be open about that. The upside however, was that we “thought” we knew what we were getting into. The first night that we stayed in the house, on Easter Sunday, the furnace stopped working. I kid you not, this is our luck. A few months later the water heater had rotted out and leaked all over the basement floor. Like everything has been a HUGE project, even if we thought it was going to be simple!
So the Basement Remodel basically came out of me being angry {if you know me, imagine that, right?!?}. My little girl had been vomiting for 7 days straight. She ended up vomiting blood, so I rushed her to the ER. Thankfully, she was fine, she simply tore her esophagus a little from throwing up so much. However, the next day, I had had it. I called Jas and told him he needed to figure out how to tear the entire basement out. I wanted it done, no questions asked.
Back in the 90’s the water main in front of the house broke. The water came gushing down the driveway and flooded the entire basement about 4′ up the walls. I was told it was never “properly” cleaned so I just assumed there was mold in the house. After about a week the entire basement had gotten cleaned out, the old 70’s style bar was donated and Jas went to work tearing it out. And guess what…no freakin’ mold. Can you believe that? I couldn’t. I searched and searched with flashlights trying to find something. NOTHING.
We also came to the realization that there was ZERO insulation in the basement. Again. NOTHING. NADA. ZERO. ZILCH!
After talking with Jas we decided to tear out the wall that you see in the image above. There were basically three rooms in the basement:
- Laundry Room with Storage
- Storage Room
- Living Area
We didn’t need two storage areas and you can always use livable square feet so that’s what we decided to do. Plus, it gave me a chance to get rid of A LOT of crap that we simply don’t need. I feel like if you have items in the basement in storage that’s never going to be seen, they either need to be displayed properly, put to use or simply get gone! That’s exactly what we did.
After we tore down the wall, the drop down ceilings were removed as well as the fluorescent lighting! We hired a “friend” of ours to come in and demo a second wall and build a new one, we essentially just pushed the wall back about 10′. After that wall was put up, our entire project came to a screeching halt. Not a single person wanted to work.
The “friend” who helped pretty much bailed, no call, no show. No my first piece of advice, don’t hire friends/family to do big jobs like this! We couldn’t afford to hire a company and our budget was out the window at that point. I mean, I’m a stay at home Mom (who’s trying to run recipe website) and we don’t have credit cards. So I wasn’t about ready to go finance this adventure and had to pull from savings, which I hate doing! Plus, we were under a time constraint as we needed to get the garage back that was now storing our entire basement and not to mention all of our kids outdoor toys were buried! Needless to say, it was the summer from hell! After about 4 months of no work, Jas and I finally decided to take it into our own hands. A friend that does electric in new homes for a living came down and re-wired our entire basement.
Literally every weekend we spent together in the basement. Either running copper water pipes in a new direction so that we didn’t have to have but one bulk head in the ceiling, running can lights, putting up insulation, installing new drywall, framing for the new ceiling, mudding the drywall, sanding the drywall, cleaning the drywall…
A post shared by Marci Loehner (@heavenlyrecipes) on
I hate drywall…and the biggest project of them all…laying the tile floor.
Yup, you read that right! We laid almost 1,000 sq. ft. of tile. This was a job we REALLY wanted to hire out, because:
- We’ve NEVER laid tile.
- The floor is super wavy and pitched to a drain in the laundry room.
- Didn’t want to chance the tiles popping up or cracking because we didn’t lay it right.
- We both have bad backs!
- Just didn’t want to do it!
OMG. We seriously tried to pay people to lay this floor and NOBODY wanted to do it. Not even people who do this for a living.
Julyo tile is the porcelin tile that we ended up picking out and we went with a darker gray tile
I didn’t realize this until now {as I’m grabbing my pictures off Instagram}, but, it took us exactly two months to lay this floor! But, you know what? We did it! Honestly, during this project, it brought Jas and I closer together. We had to work together, work as a team and get it handled! The floor may not be 100% perfect, but, we watched A LOT of YouTube videos on how to properly lay the floor to concrete, what adhesive to use and how to seal the grout and the tile.
A post shared by Marci Loehner (@heavenlyrecipes) on
Everytime I go into the basement now I LOVE IT. Like, I seriously LOVE IT. Not to mention, I’m proud of myself because I tiled half of the basement. I could show you the rows that I did and I must say, they are stuck down and never coming up! And to the person who may purchase this home {although, I’m doubtful we’ll ever sell it!} I hope you love it as much as I do!
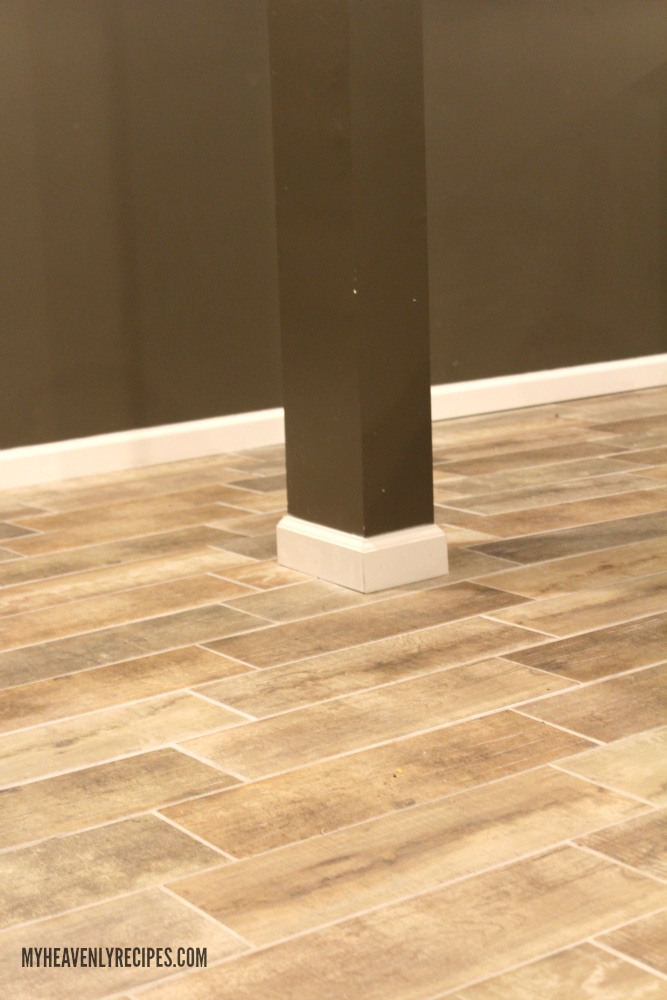
I like to “think” that I can DIY. But, I enjoy re-doing furniture and painting walls, rather than redo an entire basement from top to bottom and everything in between. It was a HUGE learning experience from the sticker shock on the price of tiles to learning that if we want something done, we need to do it ourselves to literally learning how to lay tile.
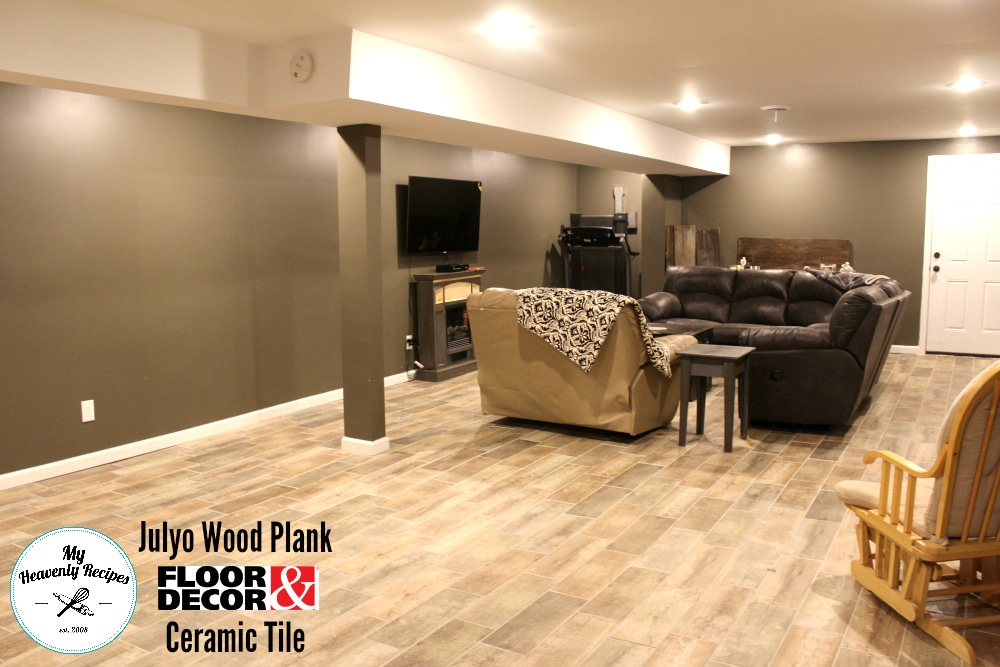
Have you been wanting to lay tile? If so, here are some pointers:
- If doing a large area, knee pads are a MUST.
- Have a bad back? Do small areas at a time.
- Back butter your tile! This simply means adding grout to the tile and then use a trowel for the floor.
- Lay your tiles out in a pattern first. Play around with the patterns (herringbone, subway, stack, etc.)
- It doesn’t have to be perfect. My OCD says so!
- Clean, clean, clean. Make sure the surface and the tile are super clean.
- When mixing grout, wetter is better. Mixing it to dry makes for rushing and mistakes.
- Don’t rush it. Look, it took us two months almost every weekend to lay 1,000 sq. ft. of tile. We learned a lot along the way and rushing isn’t necessary.
- Use tile spacers.
I hope that you enjoyed our year long Basement Remodel before and after as much as I have! I’ve still got a lot of projects to get done in the basement. The first one will be adding a bathroom in the basement! I’ll also be adding a bar/island for entertaining, adding a few DIY projects with all that old barn wood on that back wall and may even do a tutorial on how I makeover the basement stairs! So be sure to stay tuned!
A few other DIY Projects that you may be interested in:
- Our Playroom Makeover {the Reveal}
- Farmhouse Buffet Is Stunning
- How to Paint Kitchen Cabinets Like a Professional
- Chalk Paint Fireplace Makeover
I love to see what you are creating in your home! Be sure to share the recipes you found on MyHeavenlyRecipes.com with me on Facebook, Twitter, Pinterest and Instagram for more Heavenly Recipes & DIY Projects.

