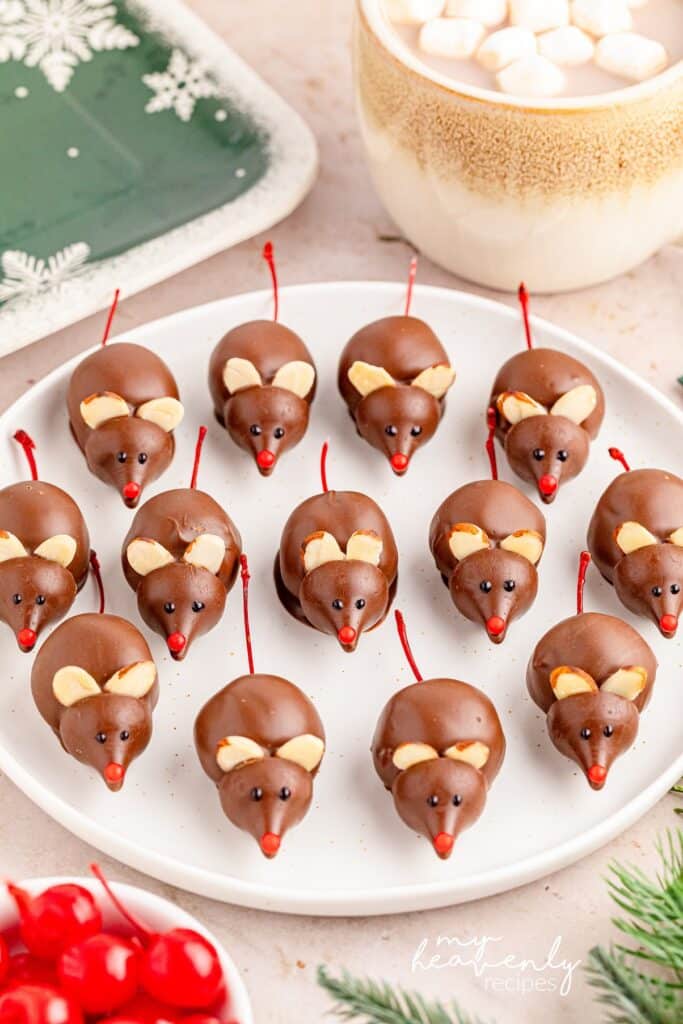
Chocolate Covered Cherry Mice
How to Make Cherry Mice for Christmas
If you’re looking for a cute, fun, and slightly mischievous treat to make, these chocolate cherry mice are just the thing. They’re perfect for parties, holidays, or any time you want a snack that’s almost too cute to eat (almost!). Here’s how to whip them up.
This post may contain affiliate links. Please read our Disclosure Policy.
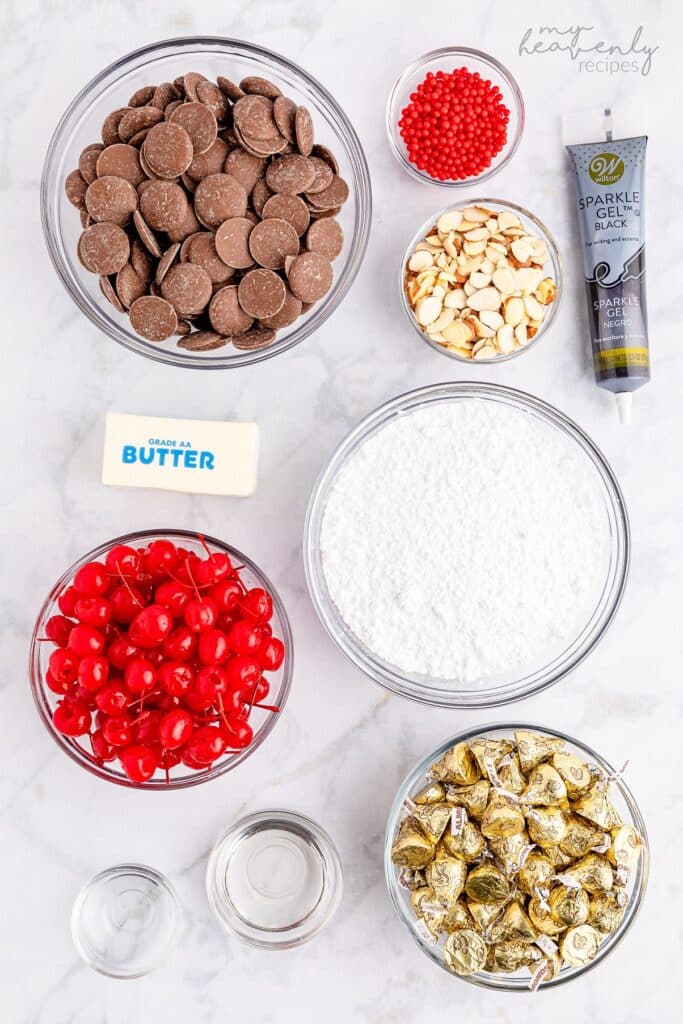
What You’ll Need:
- 2 jars (10 oz each) maraschino cherries with stems, drained and patted dry
- 2 ½ cups powdered sugar, sifted
- ¼ cup unsalted butter, softened
- 3 tablespoons corn syrup
- 1 teaspoon almond extract
- 10 oz milk chocolate melting wafers (Ghirardelli recommended for that silky melt!)
- 30 milk chocolate almond Hershey’s Kisses for the heads
- Almond slices for the ears
- Black decorative icing for the eyes
- Red sugar pearls for the noses
Let’s Make Some Mice!
- Prep Your Workspace: Line two baking trays with parchment paper and set them aside.
- Make the Dough: In a large bowl, mix the softened butter, corn syrup, and almond extract until smooth. Gradually add the powdered sugar, kneading until you have a soft, pliable dough.
- Wrap the Cherries: Pinch off small pieces of dough (about ½ tablespoon each), roll them into balls, and then flatten them into little discs. Wrap each disc around a cherry, leaving the stem sticking out—that’s your mouse’s tail! Handle them gently so the stems don’t snap. Once wrapped, pop them in the fridge for 2–4 hours to firm up.
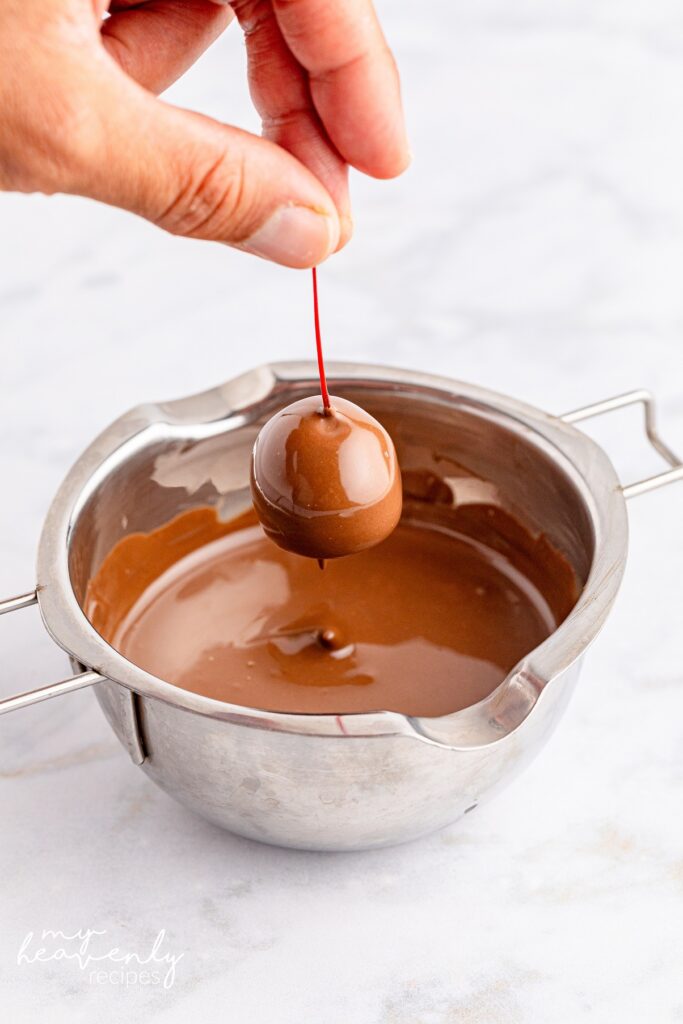
- Dip in Chocolate: Melt the chocolate wafers in a double boiler or a candy melting pot over low heat, stirring occasionally. Hold each chilled cherry by the stem (or use a fork) and dip it into the chocolate. Let any excess drip off, then place the cherry on the parchment-lined tray on its side.
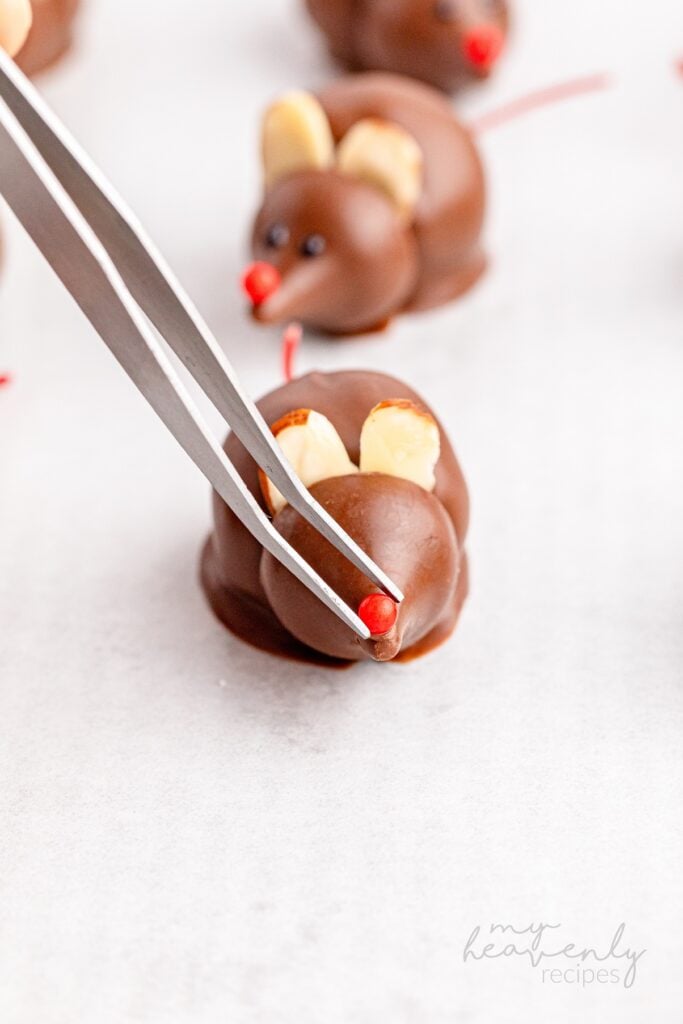
- Add the Heads and Ears: Press a Hershey’s Kiss on the opposite end of the stem for the mouse’s head. Slip two almond slices in between the cherry and the Kiss to form ears.
- Decorate the Face: Dab a tiny bit of melted chocolate onto the tip of each Kiss and place a red sugar pearl for the nose. For eyes, use black decorative icing to add two small dots. Pro tip: if the icing is too runny, a toothpick works perfectly for precise placement.
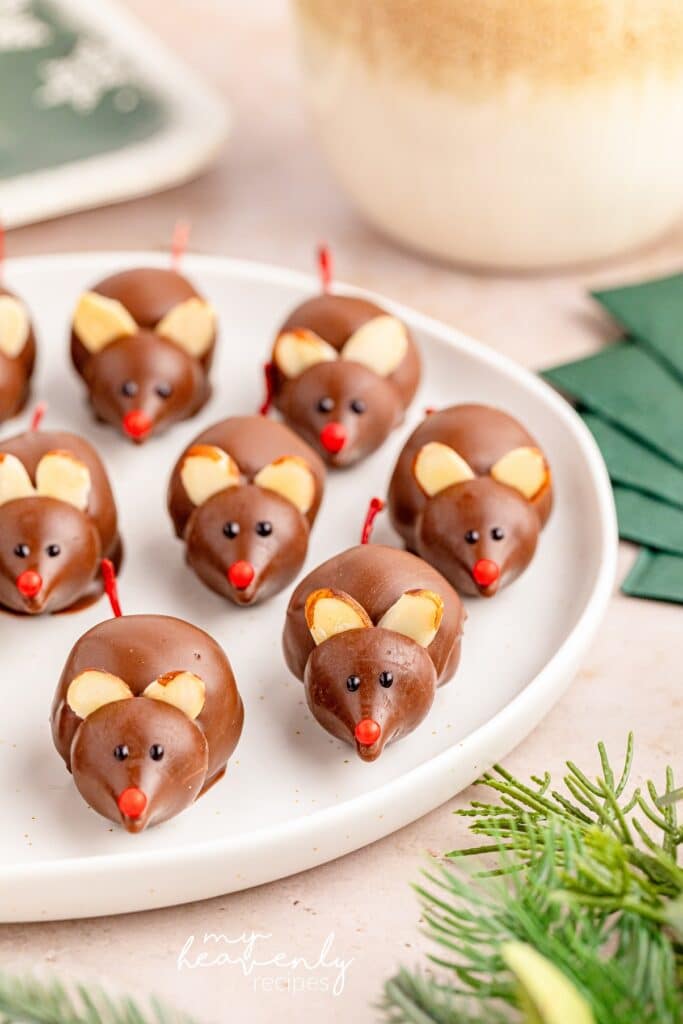
- Chill and Serve: Once all the mice are assembled, pop them back in the fridge until ready to serve. They keep well in an airtight container in the fridge for up to 3 weeks—if they last that long!
These little guys are surprisingly simple to make but look so impressive on a dessert tray. Plus, they’re chewy, chocolatey, and have that perfect sweet-tart cherry surprise inside. Give them a try—your guests (and maybe even a few sneaky little kids) will love them!

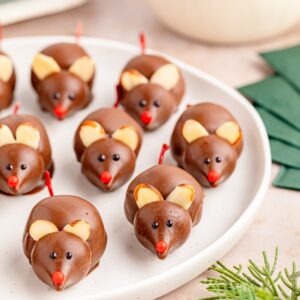
Chocolate Covered Cherry Mice
Servings 30 mice
Ingredients
- 2 10 ounce jars maraschino cherries with stems well drained and dried
- 2 ½ cups powdered sugar sifted
- ¼ cup unsalted butter softened at room temperature
- 3 tablespoons corn syrup
- 1 teaspoon almond extract
- 10 ounce Ghirardelli milk chocolate melting wafers
- 30 milk chocolate almond Hershey’s Kisses for the head
- Almond slices for the ears
- Black decorative icing for the eyes
- Red sugar pearls for the nose
Instructions
- Line two baking trays with parchment paper and set aside.
- In a large bowl, mix the butter, corn syrup, and almond extract together until smooth and well combined.
- Gradually add the powdered sugar into the bowl and knead together until a soft dough forms.
- Pinch off ½ tablespoon sized pieces of dough, roll into a ball, then flatten the balls into discs.
- Wrap each disc around a maraschino cherry, keeping the stems exposed. Use your hands to carefully roll each ball into shape. Be careful not to break the stems off as they will be the mouse tail. Repeat with the rest of the cherries and dough. Refrigerate for 2-4 hours, until firm.
- Once firm, melt the milk chocolate wafers in a double boiler or candy melting pot over low heat. Stir occasionally to ensure it is heating evenly.
- One at a time, gently hold each cherry by the stem and dip it into the melts. You can use a fork if needed to lift the cherry out without breaking the stem off.
- Place the dipped cherry back onto the prepared baking tray and lay it on the side. The cherry stem will be the mouse tail.
- Press the bottom of a Hershey’s Kiss onto the opposite side of the stem. This will be for the mouse head.
- Stick two almond slices similar in size for mouse ears between the cherry body and the Hershey’s Kiss head. Repeat with the rest of the cherries.
- Once the head, body, and ears are all attached, decorate the face. Using a toothpick or skewer, dab a tiny amount of melted chocolate onto the top part of the tip of the Hershey’s Kiss and place a red sugar pearl for the mouse nose. Hold it in place for a few seconds to ensure it does not fall off. Repeat with the rest of the candy mice.
- For the eyes, dab two dots of black decorative icing onto the Hershey’s Kiss face. You can do practice rounds onto a piece of parchment paper or napkin to see how it comes out. If the icing is coming out of the tube too quickly, you can use a toothpick or skewer to dab a small amount where needed. Repeat with the rest of the mice and then refrigerate until ready to serve.
Notes
Store leftovers in the refrigerator in an airtight container for up to 3 weeks.