Homemade Caramel Sauce Recipe
How to Make Caramel Sauce at Home
Making caramel at home isn’t as scary as it seems—promise! The key is patience and keeping a close eye on it. Sugar goes from golden to burnt in a blink, so once it starts changing color, don’t walk away (yes, even if your kid yells from the other room!). Use a sturdy, thick-bottomed pot to help heat things evenly and prevent hot spots that can cause burning. Also, resist the urge to stir once the sugar starts bubbling. Stirring can actually make it crystallize and turn grainy. Instead, just let it simmer and swirl the pot gently if needed.
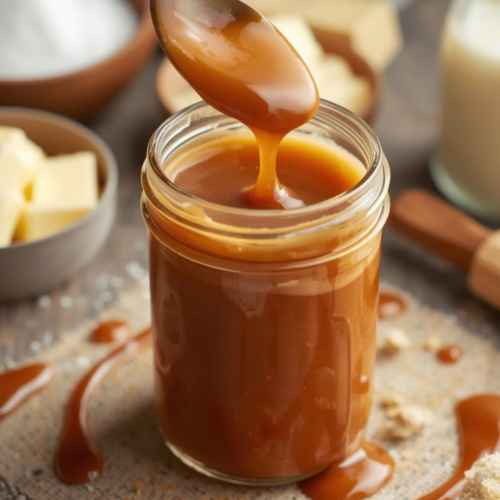
If you see sugar crystals forming on the sides of the pot, you can use a clean, damp spatula or pastry brush to gently wipe them down. That helps keep the sauce nice and smooth. And be super careful when adding the butter and cream—caramel gets very hot and will bubble up like crazy when the cold ingredients hit it. Use a long-handled whisk and take your time pouring things in slowly. Once it’s done, let it cool before tasting (seriously—it’s like molten lava at first!). After it cools completely, it’ll thicken up beautifully and keep in the fridge or freezer for whenever you need a sweet drizzle on something. Homemade caramel = total mom win. I like to use it for my coffee drinks in the morning or to dip cut up apples in!

Make sure to try our homemade caramel candies too!
Homemade Caramel Sauce
Ingredients
- 1 cup granulated sugar
- ½ cup heavy cream
- 6 tablespoons unsalted butter , cut into pieces
- 1 teaspoon vanilla
- pinch of salt
- ¼ cup water
Instructions
- Grab a 3-quart thick-bottomed pot (this helps keep things from burning). Pour in the sugar and water, and give it a gentle stir—just enough to mix it. Try not to splash any up the sides of the pot; we want it all settled in a nice, even layer.
- Put the pot on medium heat and let it do its thing. In a few minutes, the sugar will melt—it’ll go from cloudy to clear and start bubbling. Once that bubbling starts, don’t stir anymore! Just let it simmer gently on medium heat.
- If you see any sugar crystals forming around the edges, use a spatula to gently brush down the sides. This helps keep it smooth and prevents it from turning grainy.
- Now just let it cook until it turns a deep golden color—like honey. This part takes a bit (anywhere from 8 to 15 minutes), so don’t walk away. It can go from perfect to burnt real fast.
- Once it’s that rich golden color, carefully add the butter. Heads up—it’s going to bubble up like crazy! Just keep whisking until the butter melts completely.
- Take the pot off the heat and slowly pour in the heavy cream, whisking the whole time. It’ll bubble again (totally normal). Keep whisking until everything’s smooth and gorgeous.
- Add the good stuff: Stir in the vanilla and salt. That’s it—you’ve made caramel!
- Let the caramel sit in the pot for about 10 minutes to cool down a bit. Then pour it into a glass jar with a lid. It’ll still be runny at this point, but don’t worry—it thickens up as it cools.
- Once it’s completely cool, pop it in the fridge (since it has cream and butter in it). It’ll firm up into that rich, chewy texture.
- When you want to use it again, just warm it up gently and give it a little stir. Done!