Cream Cheese Mints Recipe
How to Make Cream Cheese Wedding Mints

Make these delicious melt in your mouth – cream cheese mints! You can find these as wedding favors all the time. I remember eating them all when I was younger! Make sure to try our Christmas cream cheese mints and cream cheese mint wreaths for Christmas time, too!
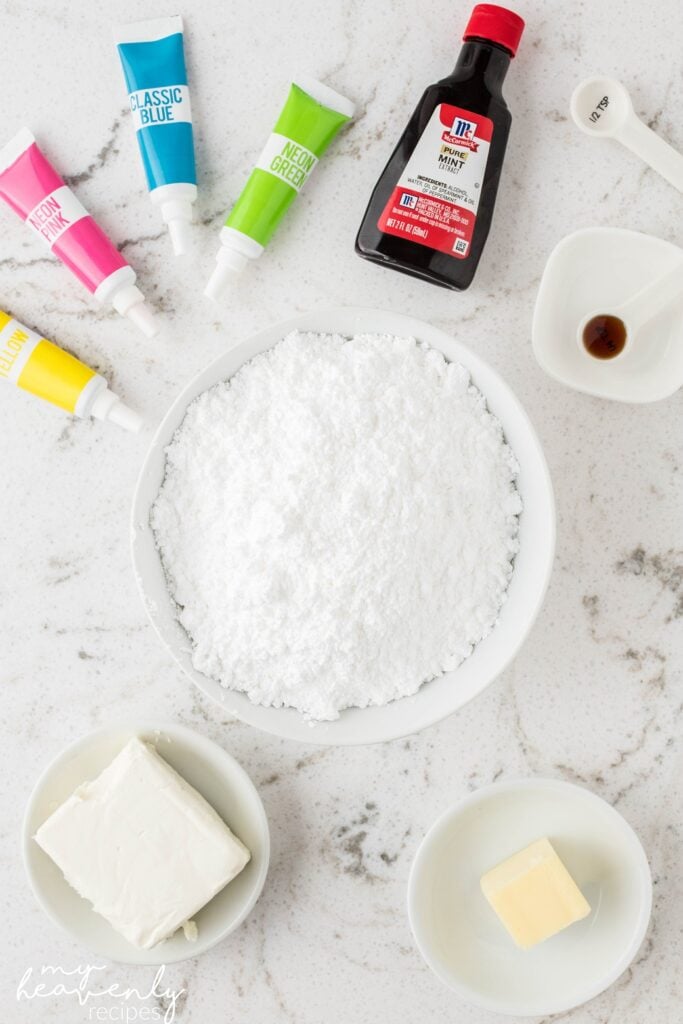
Before you start making these delicious treats, make sure you have all the necessary tools and equipment. First, gather your measuring essentials, including measuring cups and measuring spoons. Next, prepare your baking setup with a baking sheet lined with wax or parchment paper. This will make cleanup a breeze and prevent any sticky messes. For mixing and blending, you’ll need either a hand or stand mixer, along with a trusty rubber spatula for scraping the sides of the bowl. Finally, round out your toolkit with a kitchen knife for any necessary chopping, and a fork for various tasks. With all these essentials at your disposal, you’ll be well-equipped to tackle your recipe and create something truly special!
To make these delicious creamy mints, you’ll need a few key ingredients. First, full-fat cream cheese is essential for its rich flavor and thick consistency – just be sure to soften it along with the butter at least 30 minutes ahead of time. Speaking of butter, salted butter is the way to go, as it elevates the flavor of the mints and helps create their structure. Powdered sugar brings sweetness to the table, while also providing some of the mints’ structure. To give the mints their signature flavor, you’ll need peppermint and pure vanilla extract – the peppermint packs a refreshing punch, while the vanilla adds warmth and depth. Finally, add some colorful fun with pink, yellow, blue, and green food coloring – perfect for springtime and totally customizable to your favorite hues!
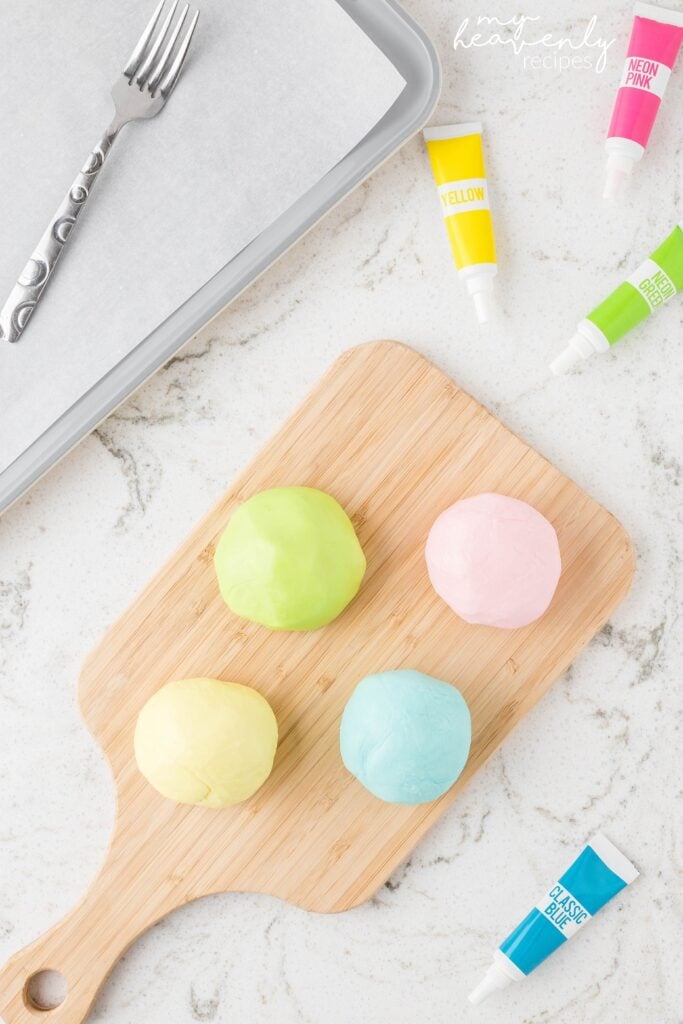
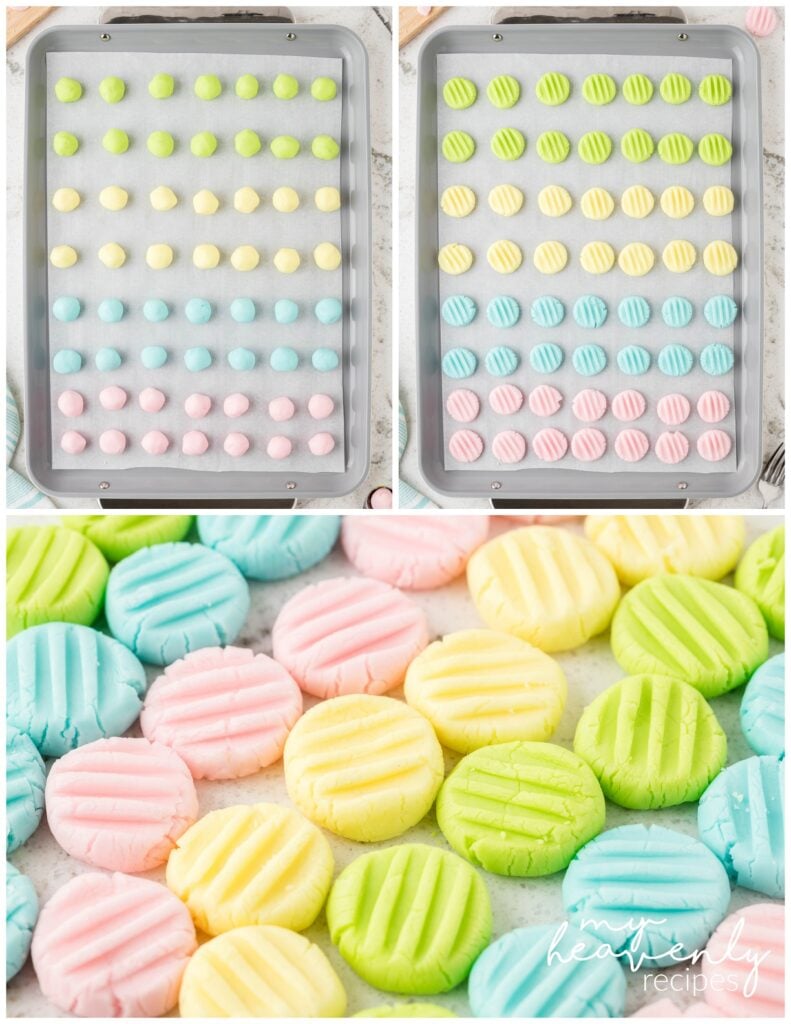
To make these adorable cream cheese mints, start by preparing a baking sheet with wax or parchment paper. Then, use a mixer to cream together cream cheese and butter until smooth, before gradually adding powdered sugar, peppermint extract, and vanilla extract to form a dough-like mixture. Divide the dough into four portions, add food coloring to each, and mix until the desired color is achieved. Roll each colored dough into small balls, flatten slightly with a fork, and let dry at room temperature for two hours before refrigerating or freezing. Serve and enjoy your delicious homemade mints!

You’re probably wondering how to store these mints to keep them fresh. The good news is that they’re easy to store and can be kept for a while. Simply place the mints in an airtight container and refrigerate them for up to 7 days. If you want to keep them for longer, you can even freeze them for up to 3 months – just be sure to thaw them before consuming.
If you’re looking to make some substitutions in the recipe, don’t worry – there are a few options you can try. For the cream cheese, you can use reduced-fat cream cheese if you prefer a lighter version. If you don’t have salted butter on hand, you can use unsalted butter instead. And if you’re out of pure vanilla extract, imitation vanilla will work just fine.

Cream Cheese Mints
Ingredients
- 4 ounces full-fat cream cheese softened
- 1 tablespoon salted butter softened
- 4 cups powdered sugar
- ½ teaspoon pure peppermint extract
- ¼ teaspoon pure vanilla extract
- Pink yellow, blue, and green food coloring
Instructions
- Prepare a large baking sheet with wax or parchment paper. Set aside.
- Use a stand or hand mixer to cream 4 ounces of cream cheese and 1 tablespoon of salted butter until smooth and creamy. Scrape down the sides, then slowly add 4 cups of powdered sugar until combined. Then add ½ teaspoon peppermint extract and ¼ teaspoon pure vanilla extract and blend. The mixture should be like dough. Roll the dough into a large ball.
- Use a knife to divide the dough into 4 equal portions and place each part into a separate bowl. Add the food coloring to each dough ball. Then mix and knead each dough ball until it is the desired color. Be sure to wash your hands after working with each dough ball color.
- Next, use a teaspoon to measure a piece of each color of mint. Roll the teaspoon of dough between your palms to form a small smooth ball. Place each dough ball on the prepared baking sheet. Then use a small fork to press out the little mints.
- Allow them to dry at room temperature for 2 hours, then refrigerate or freeze.
- Serve and ENJOY!


